Showing posts with label 5"x5" Gelli Plate. Show all posts

Thursday, June 16, 2016

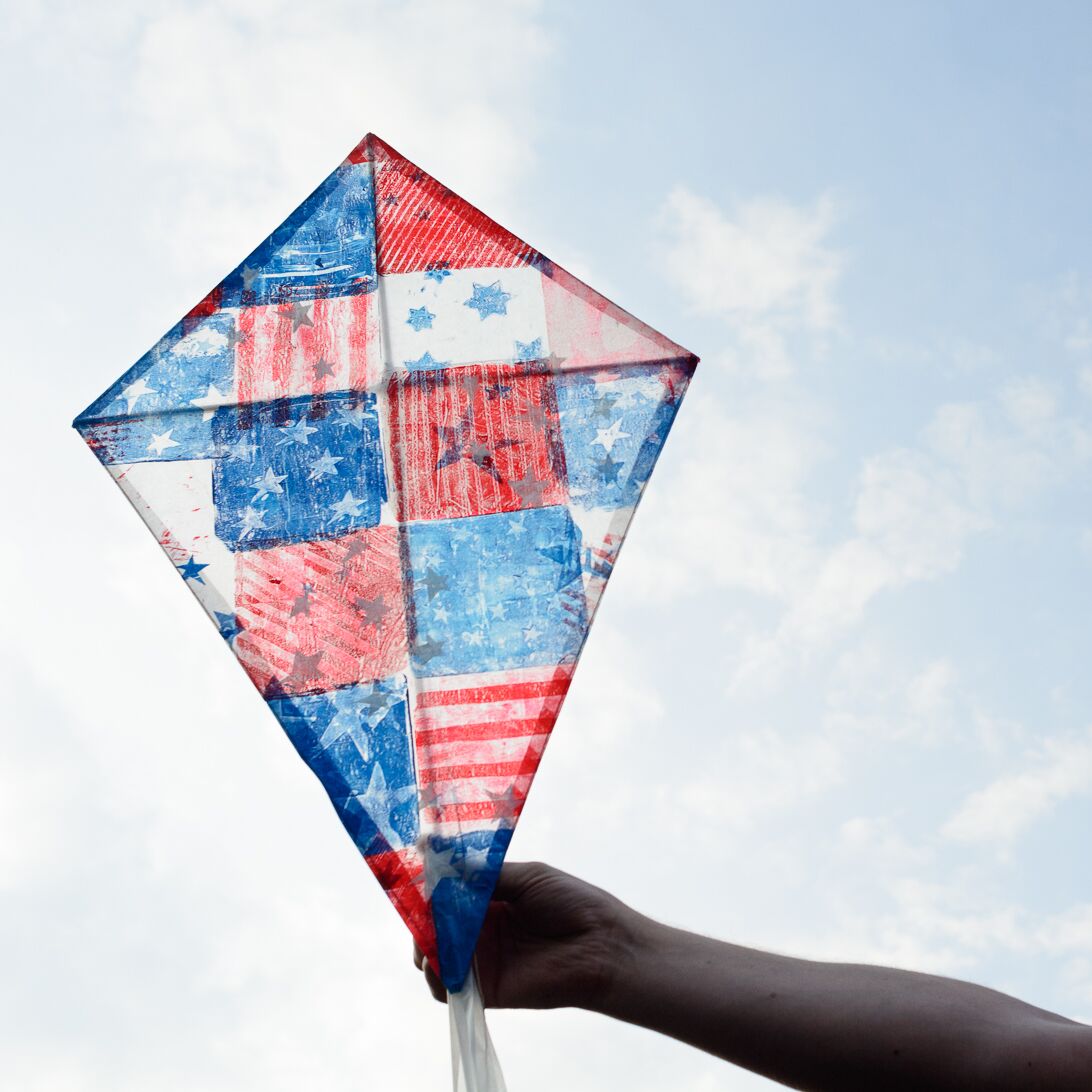
Gelli� Printed Diamond Kite

Hi there! My name is Marsha Valk and I�m excited to share this simple diamond kite! It is easy to make, fun to create and also loads of fun to play with once it�s done!


Preparations:
First decide on how tall you want your kite to be. This determines the length of the dowels you�ll need and also the measurements of the paper needed to create the sail.

For a diamond kite you need two wooden dowels with a fixed size ratio of 3:2. The kite paper I used happened to be a little over 27.5� tall, so I used a small hand saw to trim my long dowel to 27.5� and then my short dowel automatically had to have a length of 18.33�.

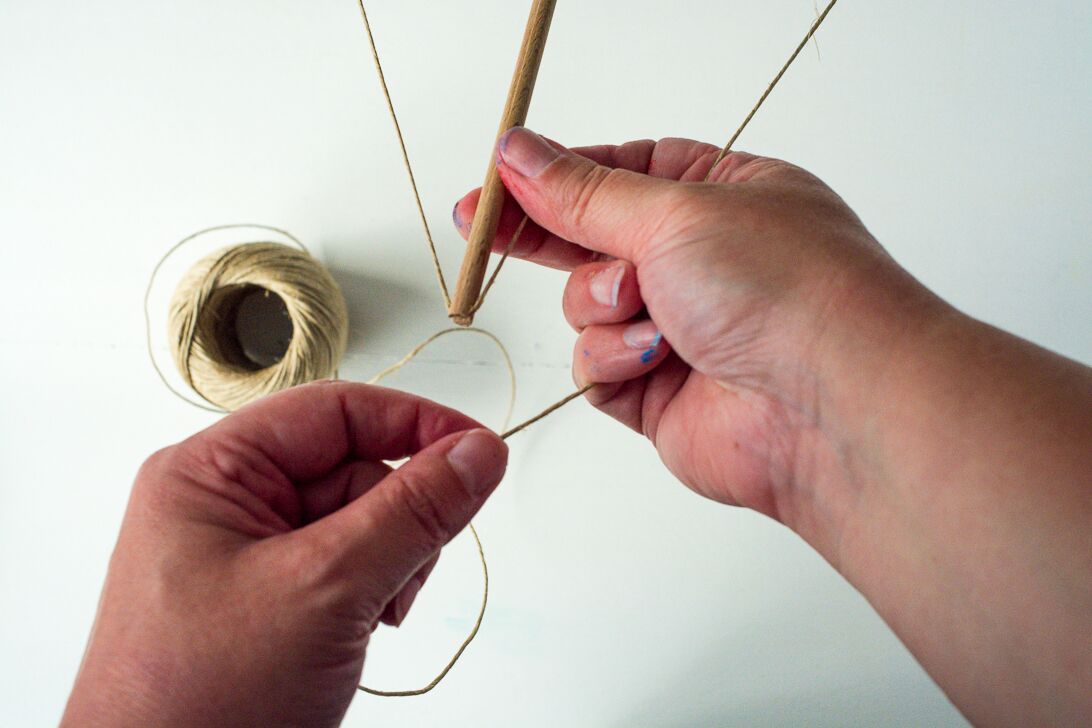
Cut a little notch in each end of the dowels. This is where the string will be attached later on.


I trimmed my paper sheet down to slightly larger than 27.5� x 18.33�. Kite paper is a translucent glossy lightweight paper and you can easily substitute it with deli paper or even something like newspaper.

Mark makers and printing plates:
I wanted the kite to have stars and stripes. So I went to look for mark making tools that could make stripes or stars.

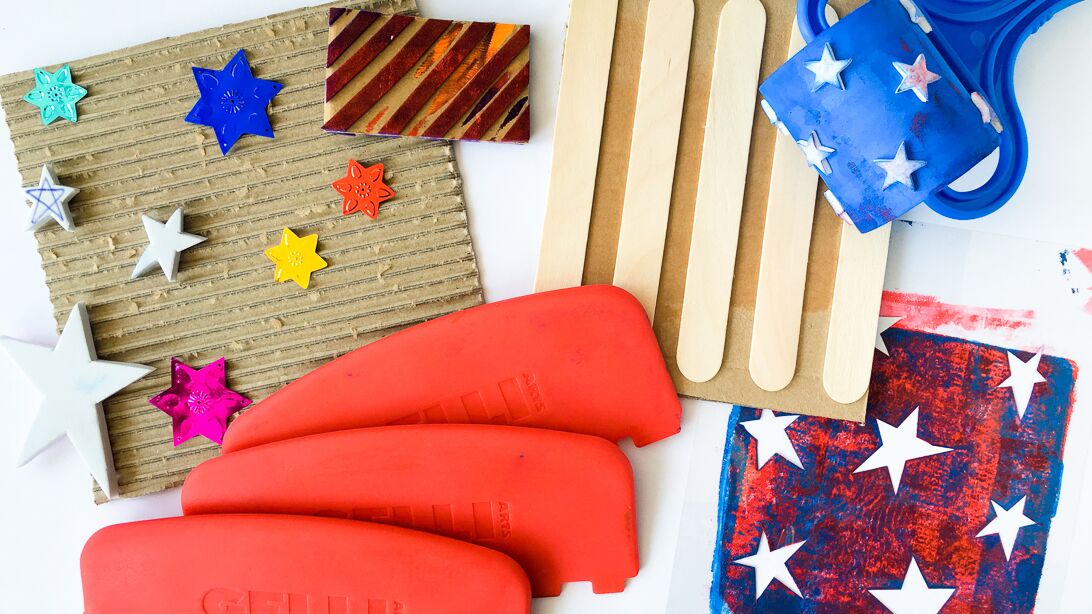
The stripes were easy enough: stripped corrugated cardboard, a handmade foam stamp and the  Gelli� Arts Square Edge Tools would do the trick. I also created a broad striped printing plate by adhering a couple of craft sticks to a piece of cardboard.


The stars were a bit harder to find, so I created my own stamps by drawing simple stars on thick craft foam and then cutting them out with scissors. The stencil was made by drawing stars on a transparency and then cutting the insides out with scissors. I found the stars roller stamp at a local store (HEMA), but you can easily make something similar yourself. The sequins will act as a mask.


Printing:
Apply acrylic paint to the Gelli� plate of your choice. I used the 5" x 5� Student Plate.

Make marks with the stars and stripes tools. You�ll only need a thin layer of paint for each print. Too much paint will buckle the paper. Be sure to clean the plate and the brayer when you switch to another paint color.

Watch my video to get a better idea of how I did it! 

Because of the translucent nature of the paper, it�s easy to see where you print and there is no need to turn the entire sheet over after each print. You can stamp off your stamps and stencils on the backside of the paper. These images will shine through to the front of the paper when it�s done!


Once you�ve got the whole paper covered, you can add some stenciling or more stamped images on top.

Assemble the kite:
Tape the two wooden dowels together with strips of duct tape, as tight as possible. The short dowel should be placed at exactly 1/3 of the long dowel (in my case at 9.2� from the top).


Run the string along the notches in the dowels. Start at the bottom and end with a little knot.


Reinforce the knot with tape if necessary. Place the kite frame on top of the paper. Cut the sail slightly larger than the kite frame. Add glue to the seam and fold it over.


Attach a flying line to the kite and add a tale made of ribbon, fabric or paper strips. Or add a length of string with paper or fabric bows every 16�.


The kite is ready to fly! Go outside and find out if it will sail!Not into diamond kites? Or do you want to make a different kind of kite? No problem! You can use Gelli� printed kite paper with any type of kite building method you want!


Materials

Gelli� Arts:

Other:
Transparent paper (Folia) or deli paper
Acrylic paint (Galeria)
Wooden dowel or bamboo sticks 1/4� wide
Hand saw
Transparency
Craft foam
Cardboard
Star shaped sequins
Star stamp roller (HEMA)
Craft sticks
Scissors
Ruler
Glue stick (Pritt)
Cosmetic sponge
Duct tape
String

PS: Please�share your prints with us on our Facebook page, or on Instagram using the hashtag #gelliprint #gelliarts and #gelliplate. Tag us with @gelliarts on Instagram and Twitter too! We love to see what you're creating!!

Remember, we now have Gelli partners all over the world, so it's easier than ever to find a Gelli retailer near you!


SaveSave
Read More

Thursday, March 10, 2016

Modular Origami with Gelli� Prints!

Regina here! Back with another fun project for your finished Gelli� prints: Modular Origami! 

I am super sick of this cold weather and ready for Spring to be sprung! I have been thinking about the warm breeze and flowers in bloom, so here are some gorgeous origami flowers that are easy to make and will help you get over these last few weeks of Winter!


Using a thinner paper like a Japanese rice paper or regular copy paper, I created some Gelli� monoprints using bright colors and fun stencils! You can use the 5x5 Student Printing Plate to make square prints for origami � or create prints with any other size Gelli� plate and cut your prints into perfect squares! For the flowers, you only need to print on one side of the paper.


To create one flower, you will need an even number of prints, with a minimum of six square prints.


Once all of your prints are together, you can begin creating your flower one petal at a time. I used a bone folder by RecollectionsTM while making this project in order to get a sharp crease, but you could just use the back of your nail to get a similar effect.

Step 1: Fold your square in half corner to corner diagonally, with your print on the outside of the fold. Make sure to crease well.


Step 2: With the resulting triangle placed with the longest side on the bottom, bring the right hand corner up to meet the top point of the triangle and crease.


Step 3: Repeat on the left side side and crease. You should now have a diamond shape.


Step 4: With the diamond shape in front of you, take the right hand side triangle�s longest edge and fold to the right, aligning its edge with the edge of the diamond. It should meet perfectly at the bottom edge of the diamond. Do not worry about the top edge just yet.


Step 5: Repeat on the left side and crease.


Step 6: Open up the right side flap that you just created and fold it down so you have a kite shape. Crease well.


Step 7: Repeat on the left side and crease.


Step 8: Turn over the paper and notice the white triangles on the right and left sides. These are the back of your monoprint, which is perfectly okay to leave unprinted as you will barely see it in the finished product. Fold each white triangle back to be even with the edge of the print.


Step 9: Turn the paper over so now the two triangles you just folded are visible.


Step 10: Fold the white triangle shape in on itself on the center of the �kite� line so that you recreate your diamond shape and crease.


Step 11: Bring the edges of the diamond together while adding a glue dot or your favorite dry adhesive for security. Do not crease.


Viola! You have one petal finished! Repeat steps 1-11 for the rest of your monoprints.


Attach all of the petals together and your flower is complete!


If you�re feeling really adventurous, you could make multiple flowers and attach them all together for a flower ball!


In full disclosure: I did not design this modular origami flower. I was taught how to create it by my art teacher when I was in school. I have since used this project in many ways, such as a project for my own art club, a decoration for a wedding shower, and part of a beautiful retirement gift! If you give it a try, we�d love to see your results!

Here are the materials used to create this project:
Please�share your prints with us on our Facebook page, or on Instagram using the hashtag #gelliprint #gelliarts or #gelliplate. Tag us with @gelliarts on Instagram and Twitter too! We love to see what you're creating!!

Remember, we now have Gelli partners all over the world, so it's easier than ever to find a Gelli retailer near you!


Have fun and happy printing! 
Read More

Thursday, September 3, 2015

Gelli� Plates In The Classroom - Guest Post by Camille Gammon-Hittelman

As an elementary art teacher, I'm always on the hunt for cool looking art problems for my students to solve ----  and bonus points if they can be completed in one class period! I came across Gelli Arts� printing plates at the NAEA conference in Fort Worth a few years ago, and I was hooked. That night, in my hotel room, I ordered my first Gelli� plate so it would be delivered to my house when I got back from the conference. I played with it for a while, and realized that Gelli� printing was the perfect way to introduce layered mono-printing to elementary aged students. It's non-toxic, immediate, and (relatively) easy to clean up. Even the youngest artist can make something fantastic!
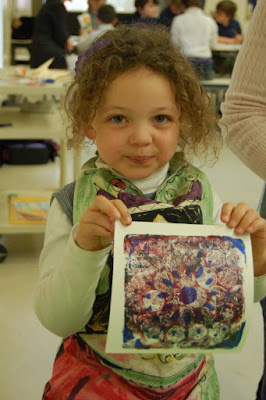


I usually reserve Gelli� printing for my oldest group ---- my 4th graders. I save the lesson for them because as the most senior of my students, they know to care for the Art Studio as their own space. They know that the space is a shared one, and that it's fine to make a mess in the name of art ----  as long as you clean it up and get the space ready for the next artist. 

I cover the tables with newspaper, and tape it down, so the entire surface becomes a usable workspace. We ink on it, we lay our stencils, we clean our brayers on it. It almost becomes a second canvas for the kids to work on! Clean up afterwards is a breeze. 

Special Note from Gelli Arts�: Make sure you leave the plastic mylar sheet on the base of the plate ----  that way the newspaper ink won't transfer onto your Gelli� plate. If newspaper ink gets on the Gelli plate, use baby oil to remove and then wash with dish soap and hot water.

You could also use butcher block paper ----  and then really keep the working surface as a frameable piece! After covering the tables, I lay out a Gelli� plate (on the mylar sheet that it ships with) and a brayer for every student. In the beginning, as I was building up my supply of Gelli� plates, I had the students share plates. That way they could work collaboratively and talk through their art-making process together. 

Gelli Arts� have come out with a new plate that is PERFECT for the classroom ----  a 5x5" square. This size lets you halve 8.5x11" sized paper, rather than using a full sheet per print. I like to cut my paper into squares to mimic the plate. 

 
(Available from Gelli Arts, Blick Art Materials, Hobby Lobby & AC Moore)

I put out a few different colors of paint (which we call "ink", since we're working on being authentic printmakers) at each table, and let the kids trade colors back and forth. This way it's ok if each table doesn't have all the colors (and that cuts back on how much paint you need on hand), and it gives you the opportunity to buy a variety of colors, rather than just a few.


As the kids come in to class, I explain that today will be an experimenting day. They will work for the full class time (60 minutes), with the exception of 10-15 minutes to clean up. This is KEY in making the art concept work. Some students believe they are "finished" when they've made one or two prints. By setting the expectation that they will work for the entire class and experiment with the process, this gives them the freedom to do just that. 

I run through a quick demo (3 minutes tops) where I show how much "ink" to lay on the plate (a toothpaste glob), and how to use the brayer. I introduce stencils, bubble wrap, and string into the process. When it comes time to make the second print on top of the first, I have them talk me through the process. And that's it. Really. Then I release them to the wilds, and  let them go to it. 

In the beginning, they start out cautiously. They use one color, then another...one stencil, and then another. And then they start experiment. That's when it gets exciting. That's when it gets loud, and messy, and fantastic. They realize that they can put more than one color on the plate! They can write words into the ink! They can ink one section of the plate, and leave another section empty!


This is the best part of the lesson. The kids get more and more excited, and start discussing what they've done.

"How'd you get that?!" "What did you do there?!"

At a few points throughout the work time, we'll all take a break from printing and circle around one student's work to talk about what they've created. This is when I explain that they're probably going to make some really ugly prints ----  and then they laugh. I tell them that artists make a whole lot of bad (unsuccessful, ugly, blech) art and then get one or two fantastic pieces. This lets them have the freedom to make mistakes, and learn from them.


And then, suddenly, it's time to clean up. Ink gets closed up and returned to the front supply table, along with stencils. Brayers soak in the sink, and are then washed and set out to dry on newspaper. Gelli� plates (and hands) get wiped down with baby wipes, and then are placed back into their clam-shell containers. Newspaper is peeled off the tables, rolled up, and placed in the recycling bin. Once the studio looks better than it did when the students entered, they are allowed to wash their hands. The kids are in charge of all of this. I stand off to the side and prod them along as needed. The prints dry on the drying rack, and are ready to go home the next day (yay for quick drying acrylic paint!). My students LOVE this lesson, and are excited to share the concept with their friends. I know it's made an impact when I get emails from parents asking where to get Gelli� plates to work with at home! 

Special Note from Gelli Arts�: the new 5x5 Gelli plates do not ship in individual clam shells. So after clean up � storage means the plates get stacked with a sheet of mylar between them, as they are originally shipped.


-- Written by Art Educator Camille Gammon-Hittelman

All of us at Gelli would like to extend a HUGE thanks to Camille for guest-blogging here today! She's shown all of us how easy it is to introduce Gelli printing into the classroom and generate excitement and a passion for printing in young students!

You can get plenty of ideas for developing lesson plans right here � from our blog posts and videos. Each post features a fun technique for Gelli printing � so take a look!

Have Fun and Happy Printing!!

It is easier than ever to find a Gelli Arts retailer near you! Check the domestic or international listings on our website or just click the button below!


Materials Used:
    • Gelli� Plates
    • Pencils (for writing names on backs of papers)
    • Printing Paper - I cut the paper down to a square that's one inch larger than the plate
    • Acrylic Paint
    • Stencils
    • Bubble Wrap
    • String
    • Feathers
    • Doilies
    • Rubber Drawing Tools
    • Brayers
    • Newspaper
    • Masking Tape - to keep the newspaper or butcher paper attached to the table
    • Baby Wipes
    • Smocks


Read More