Hi there! It�s Marsha here today, and I�m going to show you how to create super fun, inexpensive DIY chipboard texture plates that you can use for monoprinting over and over again.

I learned how to make chipboard texture plates when I was around the age of 6 or 7, and my first one was of Puss in Boots.
This technique is not just for kids though! It�s very versatile, and can be adapted to any theme or subject you like.
But as Halloween is coming up very soon, I think a couple of scary portraits are in order. Besides, they are great fun to create!
Step 1:
Take two sheets of thin chipboard (greyboard). Make sure it�s smooth chipboard that doesn�t tear but leaves a nice dent when you press a pencil or a ballpoint pen into it.

Cut one sheet to the size of the gel printing plate you are going to use. I�ve chosen to work with the 9�x12� Gelli Arts� gel printing plate because it�s perfect for bleed prints on A4 and Letter size papers.
Cut the other sheet of chipboard to the size of the paper you want to print on. I�m printing on A4 sized drawing paper, so I cut my second sheet of chipboard to 5,8� x 8,3�.
If your paper is larger than your gel printing plate, then cut both sheets of chipboard to the size of the plate.
Step 2:
Decide on an image you would like to monoprint. Sketch a draft if you want.

As said before, the subject can be anything you like, just as long as you make sure the main parts can be cut up into separate shapes.
Try to keep the main shapes as simple as possible and save the details for the insides of these shapes. Inside the shapes, you can go as detailed as you want!
Sketch the image onto the sheet of chipboard the same size as your paper.
Step 3:
Trace the lines of the image with a pen or a marker. Use a ballpoint pen to trace the details on the insides of the main shapes.

Make sure that you press the ballpoint pen firmly into the chipboard and retrace each line to create a dent. The lines you draw are going to show up in the monoprint.
Step 4:
Cut the main shapes. Look for features (like eyes, mouths, windows, etc.) you can cut out of the main forms too. Use a craft knife to cut these or, if you are creating with kids, let them use a piercer to pinprick these openings.

Step 5:
Reassemble your image on top of the second sheet of chipboard. Make sure the image is centered before you adhere all of the cutout parts to the background sheet.

Let the adhesive dry completely.
Step 6:
Place the Gelli Arts� gel printing plate of your choice on a smooth, flat surface.
Roll a drop (or two) of acrylic paint out on the plate with a brayer.
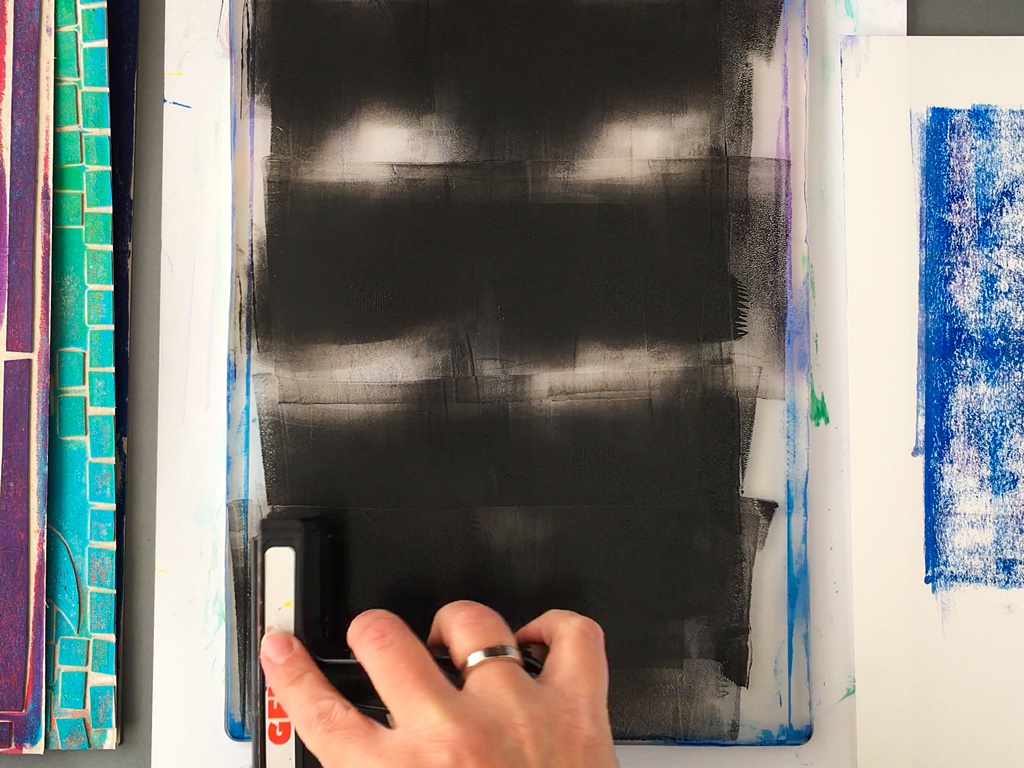
Press the chipboard texture plate into the paint. Lift the plate.

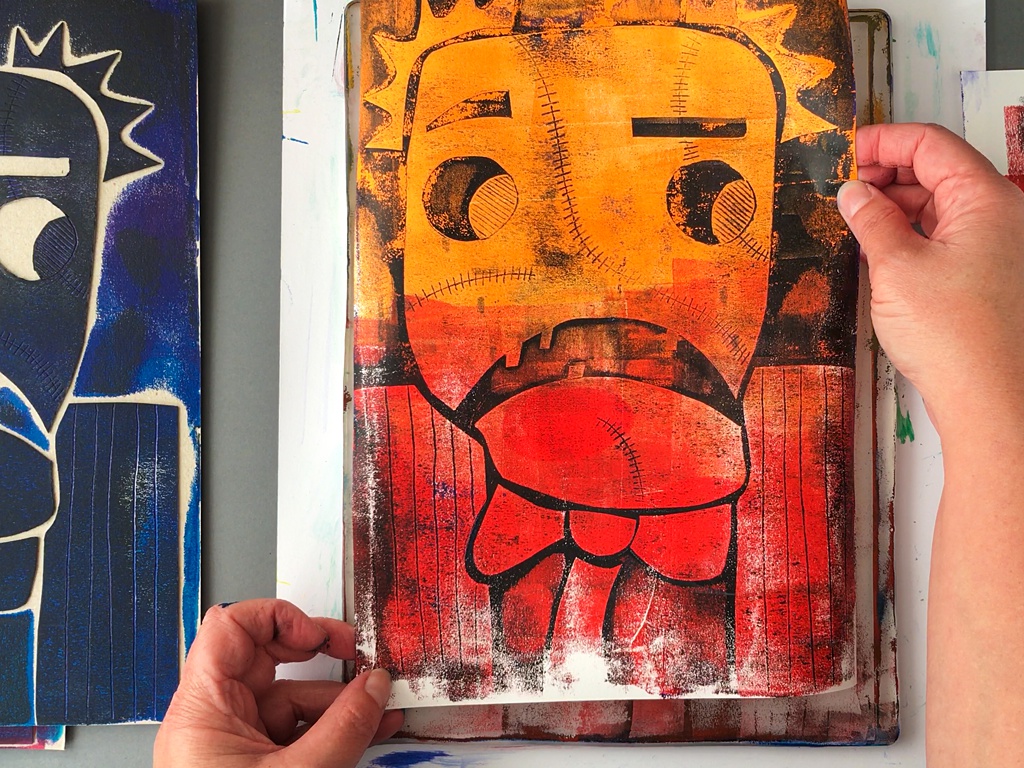
You can place your paper on top of the plate right away and rub with your hands to transfer the paint to the paper.
Or you can wait until the paint has dried on the plate, apply a thin second layer of paint, place your paper on top of the plate and then pull a ghost print.

For the best results, use dark paint colors for the first layer and light paint colors for the second.
The traditional Halloween colors don�t mix very well because they are secondary colors. So if you use them together on one print, the layers may not always come out as imagined, especially when you are working with transparent colors.
If you do want to use purple, orange, or green, then pair it with a neutral or with a tint or shade of the same color. You can also make sure the paints you choose are opaque instead of transparent.

Happy Halloween!
Marsha

Materials
Gelli Arts�:
9�x12� Gelli Arts� Gel Printing Plate
Gelli Arts� 4� Brayer
Other:
Thin Chipboard (9�x12� and 5,8�x8,3�)
Pencil
Ballpoint Pen
Scissors
Craft Knife
Adhesive
Paper to Print on (Drawing Paper 160g/m2 A4 size 5,8�x8,3�)
Acrylic Paint (Royal Talens Amsterdam)
Optional:
Paper Piercer
� 2018 by Gelli Arts�, LLC
Philadelphia, PA All rights reserved.
� 2018 by Gelli Arts�, LLC
Philadelphia, PA All rights reserved.


EmoticonEmoticon