Hi there! Its Marsha back again with another fun summer craft idea for kids!
Wouldn't it be fun to have these popsicles as decorations for a tropical party? You can add them to a bunting, send them as invites or you can create a colorful mobile like I did.
Wouldn't it be fun to have these popsicles as decorations for a tropical party? You can add them to a bunting, send them as invites or you can create a colorful mobile like I did.

Here's how I created them-
Step1:
Create a couple of fruity craft foam stamps.
Use adhesive backed craft foam or add double-sided adhesive to the back of plain craft foam. Adhere two pieces of foam on top of each other.
Create a couple of fruity craft foam stamps.
Use adhesive backed craft foam or add double-sided adhesive to the back of plain craft foam. Adhere two pieces of foam on top of each other.


Draw shapes on the craft foam using an embossing tool or skewer. Then use scissors to cut the shapes out.

Adhere the shapes to a thicker craft foam and cut around the shapes.
Step 2:
Choose a couple of ice cream colored acrylic paints to work with and start painting!
Apply paint to the plate of your choice. I used the 5" x 7" Gelli� Plate. This meant that I could print twice on each sheet of my drawing paper, but you can of course cut the paper in half too.
Make marks with the DIY foam stamps and stamp the excess paint on the stamps off onto a spare sheet of paper or onto another print.
Watch my video to get a better idea of how I did it!

Clean the foam stamps with a baby wipe or damp paper towel in between prints.

You'll need two prints of each design. The design doesn't have to be exactly the same, but you need a similar one for each side of the popsicle.
Step 3:
Cut each pair of prints out. Add more color and detail to the prints with colored pencils.
Step 4:
Apply a thin line of (temporary) glue on the edge of the back of one print and place the other one on top. Cut the prints into a popsicle shape.
Cut each pair of prints out. Add more color and detail to the prints with colored pencils.
Step 4:
Apply a thin line of (temporary) glue on the edge of the back of one print and place the other one on top. Cut the prints into a popsicle shape.

Fold the prints open and adhere a nylon cord inside. Tape the thread down first, then fold the end up and secure that with a second piece of tape.
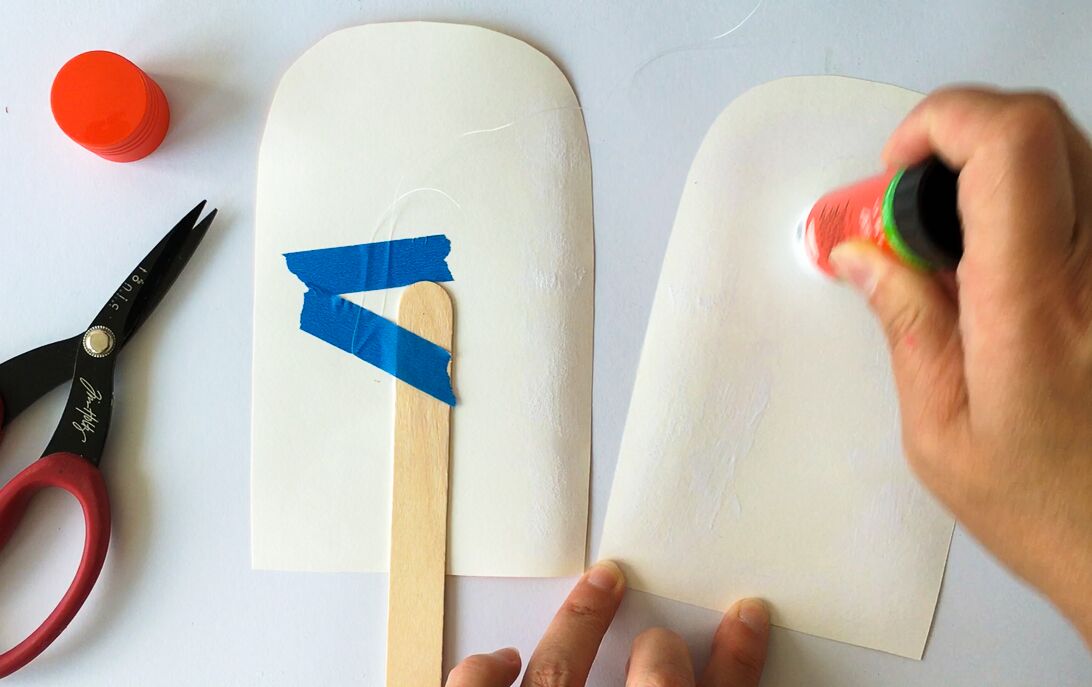
Adhere a craft stick onto the same popsicle side. Then apply glue to the other popsicle side and paste the two sides together.
Step 5:
Tie the popsicles to a metal hoop. Cover the metal hoop with washi tape.
Step 5:
Tie the popsicles to a metal hoop. Cover the metal hoop with washi tape.

Find the mobile a good place to hang, get a real popsicle and watch the paper popsicles dangle in the breeze!


Materials:
Other:
Paper (160 g/m2 drawing paper)
Acrylic paint
(Deco Art Americana, Dragon Fruit, Tangelo Orange,
Yellow Light, Sea Aqua, Indian Turquoise, Wisteria)
Craft foam
Double-sided adhesive
Embossing tool or skewer
Craft sticks
Scissors
Craft knife
Glue stick (Pritt)
(Washi) tape
Metal hoop (10�)
Nylon cord
Coloured pencils
Optional: a couple of beads
PS: Please�share your prints with us on our Facebook page, or on Instagram using the hashtag #gelliprint #gelliarts and #gelliplate. Tag us with @gelliarts on Instagram and Twitter too! We love to see what you're creating!!
Remember, we now have Gelli� partners all over the world, so it's easier than ever to find a Gelli� retailer near you!
Remember, we now have Gelli� partners all over the world, so it's easier than ever to find a Gelli� retailer near you!


