Pressing a handmade layered texture plate into a painted Gelli plate is a fabulous way to create a unique image! Watch this video for a demonstration of this easy technique.
You can make texture plates to match the size of your Gelli plate, or make smaller plates that can be used as stamps. This technique is especially fun for making custom texture plates designed speci?cally for your Round Gelli Plate.

Texture plates can be made from many different materials. The material used in the video is...heavyweight fusible stabilizer. It's perfect for making quick layered texture plates that are ready to use right away.
I use Peltex 71F (by Pellon) � a heavyweight stabilizer with fusible adhesive on one side. It's a stiff non-woven polyester material about 1/16" thick. And so easy to cut!

Those of you who quilt or sew may be familiar with this stabilizer for creating fabric bowls, bags, postcards, ATC's, etc.
What makes Peltex so interesting for making layered texture plates is its dimensional quality. As you build the layers, you're creating a deep relief pattern.
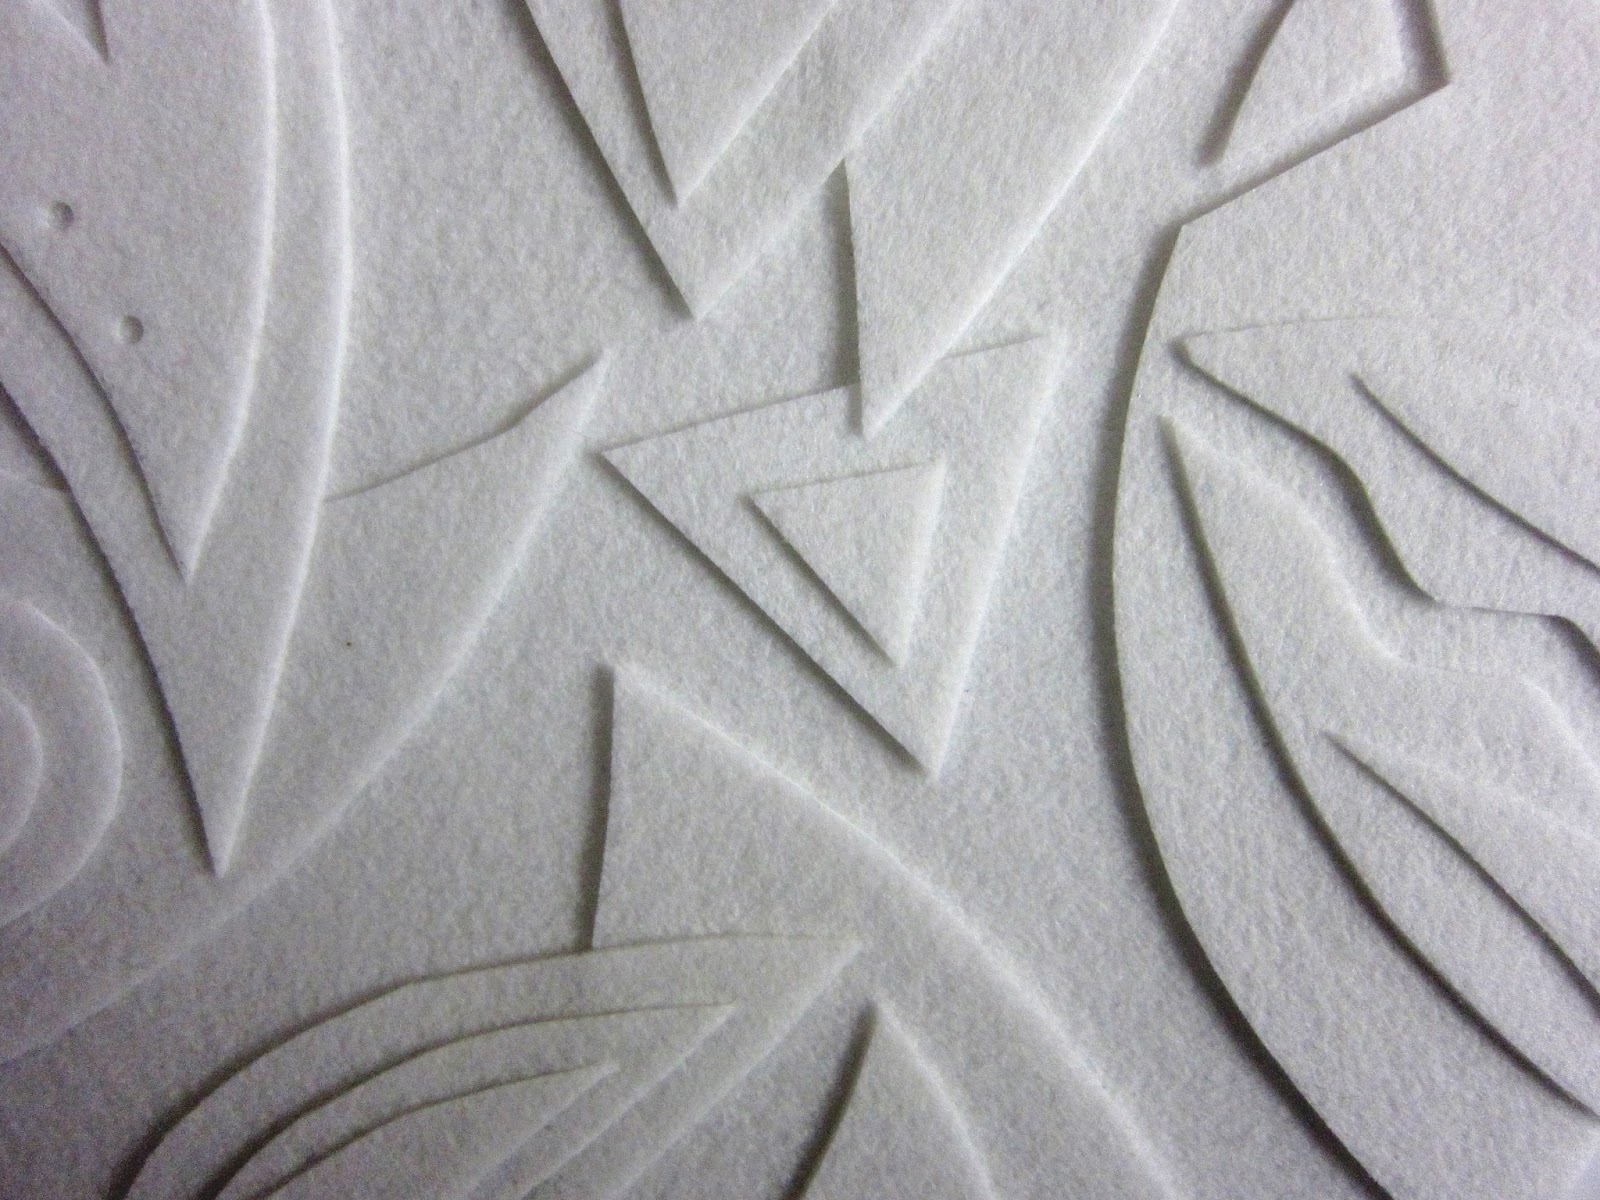
When the texture plate is pressed into a painted Gelli plate and removed � a 'halo' effect
remains around the shapes. In other words, the surface of the texture plate removes some of the paint ... but there will be a line, or shadow, around the shapes. This can make wonderful printed images � with an almost 3-D effect!

Here's how to make the texture plate:
- Cut a piece of Peltex to the desired size to use as the substrate for your texture plate.
- Place the cut substrate on a piece of parchment paper (on top of ironing surface)
- Cut pieces of Peltex into desired shapes.
- Arrange the pieces on the substrate with the fusible side down. (Layer some cut pieces on top of others to create dimension on the plate)
- Cover with parchment paper and press with a hot iron to fuse the layers together. (Follow manufacturer's instructions for fusing)
- Remove the parchment paper and trim along the edge of the texture plate.

Printing with these plates is like using a stamp.
- Apply paint to the Gelli plate and roll into a smooth layer with a brayer
- Press the texture plate firmly into the wet paint and remove
- Place the printing paper on the painted Gelli plate
- Rub to transfer paint
- Pull your print


For a dynamic effect with layered texture plates � try printing on black paper with opaque white or metallic paint!

- Peltex is available at fabric stores, like JoAnn Fabrics...and many online sources.
- When cutting a full-size texture plate for your Gelli plate, add a half inch or so to the overall dimensions � for easy handling.
- To apply a layer of paint to the round plate with a brayer � start from the center and roll out to the edge.
- Press the texture plate firmly into the wet paint. Avoid moving the texture plate while you press it into the Gelli plate, as that can blur the image.
- If you don't have Peltex, try making texture plates from sticky-back craft felt. You can find it at craft stores.
- Adhesive-backed craft felt can be cut into shapes and layered. Simply peel the backing off and stick the pieces together.
- Craft felt produces a slightly different image ... not quite as hard-edged as Peltex. If the felt plate becomes saturated with paint, stamping the felt plate on paper will give you a relief print of the image.
- When making multiple prints from the same texture plate, wet paint from the previous print may transfer to the next painted Gelli plate image. This is a wonderful way to create multi-color images! So, it�s important to consider the sequence of colors used. It's easy for the prints to get muddy as you switch from one color to another.
- Using colors with a high contrast against the paper color creates very dynamic images. Likewise, dark colors on white paper make exciting prints!
- For those of you who scan your prints and enhance them in photo-editing software � this technique lends itself to very interesting digital prints.

FYI: Materials used in this video:
- 8" Round Gelli Plate
- Deco Arts Multi-Surface SATIN�acrylic paint
- Strathmore Bristol (vellum surface)
- Strathmore Artagain (coal black)
- Speedball 4" Soft Rubber Pop-In Brayer
- Peltex 71F
- Scissors
- Parchment Paper
- Iron and ironing surface
This Contest is officially CLOSED
And here's our awesome Giveaway to get you excited about making texture plates for Gelli printing on the NEW 8" Round Gelli Plate!

- 1 - 8" Round Gelli Printing Plate
- 12 - Deco Arts Multi-Surface SATIN acrylic paints (2 oz. bottles)
- 1 - Pad (24 sheets) Strathmore Bristol (9"x12")
- 1 - Pad (24 sheets) Strathmore Artagain� coal black (9"x12")
- 1 - Speedball 4" Soft Rubber Pop-In Brayer
- 4 - Pieces of Peltex 71F (9"x12")
To enter to win, all you need to do is leave a comment here on the blog. Comments will be accepted until Tuesday, Feb. 25th at 12 noon EST. One lucky winner will be selected at random on Feb. 25th and announced here on the blog and on our Facebook page no later than Feb. 25th at 5 p.m. EST.
This Contest is officially CLOSED
And a special thanks to our friends at Deco Art and Strathmore Papers for their generous support for this giveaway!
Good luck...and Happy Printing!


