These are crazy-busy times! So what's better than Gelli printing as a way to de-stress � while you create something fun, colorful and useful! Watch this video for inspiration and ideas!
With the holidays upon us, it helps to be organized. And setting aside time to be creative is important. It's no wonder that combining these efforts into artful to-do lists and visually interesting calendar entries in planners and journals is such a huge trend!
Having a planner that doubles as an art journal (or the other way around!) is such a great way to express your creativity while staying organized and motivated.
And so many of you are adding fun stickers to your planners and art journal pages. So why not make your own Gelli printed stickers!! I'm not the first to do this, but it's such a cool idea!
All you need is label stock�and a scissors, or punches�and you're ready to Gelli print and cut your way to a batch of fabulous unique stickers!
Monoprinting on full sheets of self-adhesive label stock (8.5"x11") gives you the opportunity to cut it up into whatever shapes you want�or use punches.
Using die cut label stock is another great option. I experimented with both types, having discovered some very fun Avery label shapes at my local Staples. For Gelli printing on the die cut shapes, do not use the glossy labels�choose Matte White, White Textured or Kraft Brown for great results.
I started by printing with my 8"x10" Gelli plate�first covering half of a full label sheet, and printing a second pull on the unprinted half to get a bleed print on the entire label sheet (a bleed print has no margins�the paint goes to the edges). Then I added layers of stamped Gelli� Mini imprints, using different shaped Mini plates. But you can print on label paper with any Gelli plates!
Overlap and layer your printed images. Create your prints using your favorite techniques and textures! This is a great time to experiment with abandon�the paper is going to be cut up anyway! Have fun with it!
Materials used in the video:
- The paints are Americana Multi-Surface Satin and Media Fluid Acrylics, both by DecoArt. All stencils are also from DecoArt, including some great designs by Andy Skinner.
- Tsukineko StazOn solvent ink works great on acrylic paint�and, as you can see in the video, is easily cleaned off the Gelli Mini plates with Purell (gel hand sanitizer) and a paper towel.
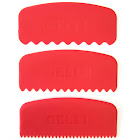
- The punches I use are Fiskars Squeeze Punches. So easy on the hands!
- TIP: Because StazOn is a solvent ink, it cleans up with gel hand sanitizer (alcohol-based cleaner). Clean up for other stamp pad inks is done with baby oil, followed by washing with dish soap and rinsing with water (as explained in this previous blog post).
Before cutting or punching your printed full sheet print into stickers, or removing the paper around die cut labels�you can add writing, drawings, rubber stamping and stenciling to further embellish your prints.
When the paint is dry, you're ready to cut or punch shapes into stickers.
Now you're ready to get creative! Peel the liner off your unique stickers and put them on your journal pages! And planner pages, tags, and envelopes! Use cut pieces for collage�no glue needed! How easy is that!
Stick a little piece of your art wherever you want!
Printing on die cut label sheets not only gives you fabulous pre-cut sticker shapes�you also get the negative area on the sheet. So create wonderful areas in your journal, planner, collages, or artwork using the sticker 'waste'! You can use every last bit of each sheet!
Making stickers with Gelli printing is so easy, so relaxing, and so much FUN!! Try it!
THIS GIVEAWAY IS NOW CLOSED!!!!
Winner is Katie Kelley!
Our AMAZING GIVEAWAY is a kit for Gelli printing stickers�and an Arc Planner to keep you artfully organized!
One lucky winner's prize kit will include:- 1 - 8"x10" Gelli Arts� Gel Printing Plate
- 1 - Set of Gelli Arts� Minis (Square-Round-Triangle shapes)
- 1 - Set of Gelli Arts� Minis (Oval, Hexagon, Rectangle)
- 1 - Package of Full Sheet Labels
- 1 - Arc Planner
- 1 - Arc Travel Punch
To enter the giveaway, click on the red "ENTER GIVEAWAY HERE" button below! (This will ensure that we can contact the winner and that entries are limited to one per person. One winner will be selected from all the entries via a random number generator to receive this very special giveaway!) Entries will be accepted until Monday, November 23rd at noon EST.
Our lucky winner will be contacted by email and announced here on the blog and on our Facebook page yes later Tuesday, November 24th at noon EST.
Please�share your prints with us on our Facebook page, or on Instagram using the hashtag(s) #gelliprint, #gelliplate or #gelliarts - we will be sure to find you! Tag us with @gelliarts on Instagram and Twitter too! We love to see what you're creating!!
THIS GIVEAWAY IS NOW CLOSED!!!!
Remember, we now have Gelli partners all over the world, so it's easier than ever to find a Gelli retailer near you!
Good Luck and Happy Printing!
Materials Used in this blog: