Swap out your brayer for some paintbrushes and create a painterly layered Gelli print! To see how easy and fun it is ... watch this video!!
The painterly approach to monotypes can range from loose and spontaneous to structured and carefully planned ... and everything in between. In other words � this technique is for everyone!!
From abstract to representational, the painterly print provides unlimited possibilities for creating an image by building layers of brushstrokes and textures.

Here's how!
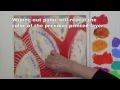
- Start by applying paint to your Gelli Arts gel printing plate with a brush. A thin layer is best � thick areas of paint will print as blobs! For this technique, you want the beauty of the brushstrokes to come through.
- Then, simply keep building on the image. Apply paint to select areas of the plate and pull your print. Keep doing this with additional layers on the same print until you're satisfied with the image.
- The residual paint on the gel plate serves as a guide for the next paint application. It should be pretty easy to see where you may want to add color and texture in each subsequent layer.

- For vibrant colors, allow the print to dry between layers. That will help keep the colors from mixing and getting muddy.
- When using cotton swabs to wipe out lines, shapes or dots on the plate ... it�s easier to remove paint if the swab is dampened first with water.
- You can apply paint to select areas of the gel plate for each layer. There's no need to cover the entire surface of the plate on each layer.
- To register your print, it helps when the gel plate is sitting on a piece of paper the same size as your printing paper. That way, you can visually align the printing paper with the paper under the plate. It's not precise, but it's usually close enough.
- It's a good idea to mark the top of the back of your printing paper with a pencil mark. That way, you won't have to figure out the correct orientation of the paper as you print each layer.
- Consider the transparency and opacity of the paints you're using, as that will greatly impact the appearance of colors as they print over one another.
- This painterly technique gives you the opportunity to be very deliberate in applying each layer. When looking at your print and deciding what you want to add in the next layer, keep in mind that what you paint on the gel plate will print reversed (mirror image).
- If you want to develop your image slowly � use a slow drying paint, like Golden Open Acrylics. Adding Golden Open Medium to acrylic paint will extend the working time of the paint.


- The paints used in the video are Golden Heavy Body Acrylics with Open Fluid Medium (Matte) added to them. The paints used in the background/negative space are Golden Open Acrylics.
- The print in the video is on 11"x14" Strathmore Bristol (vellum surface) ... and printed on a 12"x14" Gelli Arts Gel Printing Plate.
- The brushes used in the video are Princeton Catalyst Polytip Bristle Brushes.

AND � we have a very "BIG" GIVEAWAY!!
This Contest is officially CLOSED
- One (1) � 12"x14" Gelli Arts Gel Printing Plate!
- One (1) � Gelli Arts Apron printed with the official "Addicted to Gelli" badge!
- Four (4!!!) � Princeton Catalyst Polytip Bristle Brushes!
.jpeg)
- Leave a comment below on this blog post! Helpful hints:
- Click in the comment box to leave a comment (scroll to the bottom of the comments to find the box!)
- Or, click on the "# of comments" next to "published by Joan Bess" to make the comment box appear!
- Leave your comment now :)
- Comments will be accepted until Monday, Jan 20th at 12:00 noon EST.
- One comment per person � please!
- Not required... but PLEASE share your passion for Gelli printing by tweeting, posting and pinning this fabulous tutorial and giveaway! We appreciate it all!
This Contest is officially CLOSED
Thanks to Princeton Brush and Willow Wolfe for supplying the fabulous brushes for our giveaway! Good luck ... and Happy Printing!!


EmoticonEmoticon