Thursday, October 4, 2018

Create Scary Portraits with DIY Chipboard Texture Plates and Gelli Arts� Printing Plates

Hi there! It�s Marsha here today, and I�m going to show you how to create super fun, inexpensive DIY chipboard texture plates that you can use for monoprinting over and over again.


I learned how to make chipboard texture plates when I was around the age of 6 or 7, and my first one was of Puss in Boots.

This technique is not just for kids though! It�s very versatile, and can be adapted to any theme or subject you like.

But as Halloween is coming up very soon, I think a couple of scary portraits are in order. Besides, they are great fun to create!


Step 1:
Take two sheets of thin chipboard (greyboard). Make sure it�s smooth chipboard that doesn�t tear but leaves a nice dent when you press a pencil or a ballpoint pen into it.


Cut one sheet to the size of the gel printing plate you are going to use. I�ve chosen to work with the 9�x12� Gelli Arts� gel printing plate because it�s perfect for bleed prints on A4 and Letter size papers.

Cut the other sheet of chipboard to the size of the paper you want to print on. I�m printing on A4 sized drawing paper, so I cut my second sheet of chipboard to 5,8� x 8,3�.

If your paper is larger than your gel printing plate, then cut both sheets of chipboard to the size of the plate.

Step 2:
Decide on an image you would like to monoprint. Sketch a draft if you want.


As said before, the subject can be anything you like, just as long as you make sure the main parts can be cut up into separate shapes.

Try to keep the main shapes as simple as possible and save the details for the insides of these shapes. Inside the shapes, you can go as detailed as you want!

Sketch the image onto the sheet of chipboard the same size as your paper.

Step 3:
Trace the lines of the image with a pen or a marker. Use a ballpoint pen to trace the details on the insides of the main shapes.


Make sure that you press the ballpoint pen firmly into the chipboard and retrace each line to create a dent. The lines you draw are going to show up in the monoprint.

Step 4:
Cut the main shapes. Look for features (like eyes, mouths, windows, etc.) you can cut out of the main forms too. Use a craft knife to cut these or, if you are creating with kids, let them use a piercer to pinprick these openings.


Step 5:
Reassemble your image on top of the second sheet of chipboard. Make sure the image is centered before you adhere all of the cutout parts to the background sheet.


Let the adhesive dry completely.

Step 6:
Place the Gelli Arts� gel printing plate of your choice on a smooth, flat surface.

Roll a drop (or two) of acrylic paint out on the plate with a brayer.


Press the chipboard texture plate into the paint. Lift the plate.


You can place your paper on top of the plate right away and rub with your hands to transfer the paint to the paper.

Or you can wait until the paint has dried on the plate, apply a thin second layer of paint, place your paper on top of the plate and then pull a ghost print.


For the best results, use dark paint colors for the first layer and light paint colors for the second.


The traditional Halloween colors don�t mix very well because they are secondary colors. So if you use them together on one print, the layers may not always come out as imagined, especially when you are working with transparent colors.

If you do want to use purple, orange, or green, then pair it with a neutral or with a tint or shade of the same color. You can also make sure the paints you choose are opaque instead of transparent.


Happy Halloween!
Marsha


Materials
Gelli Arts�:
9�x12� Gelli Arts� Gel Printing Plate
Gelli Arts� 4� Brayer

Other:
Thin Chipboard (9�x12� and 5,8�x8,3�)
Pencil
Ballpoint Pen
Scissors
Craft Knife
Adhesive
Paper to Print on (Drawing Paper 160g/m2 A4 size 5,8�x8,3�)
Acrylic Paint (Royal Talens Amsterdam)

Optional:
Paper Piercer

� 2018 by Gelli Arts�, LLC
Philadelphia, PA All rights reserved.
Read More

Thursday, September 27, 2018

Fall Birch Prints Using an Embossing Plate with Gelli Arts� By Catherine Tonning-Popowich

I am so excited to create my first blog as a member of the Gelli Arts� Artist team! Having been asked to join the team is an honor. I love all of their products!

I've always loved Birch trees and am obsessed with drawing and painting them! I wanted a project that was quick and not too complicated involving these trees. I think I have every stamp, die, and embossing plate of Birch trees so I decided to try printing with an embossing plate!

Make sure to check out the giveaway at the end of my blog!


It just so happens I had an embossing plate that was 6"x6" to match the size of one of my gel plates. I usually lay out two or more Gelli Arts� gel printing plates when I work on a project so I can get a couple prints at the same time.


Using Midnight Multi-Surface paint by Plaid�, I loaded my brayer and rolled the paint onto the embossing plate. I used the side that had the trees raised out. The brayer just catches the trees when you roll over them.


I then turn the embossing plate over and press it onto the gel plate. I used a clean brayer and rolled on the back of the embossing plate to push the paint onto the gel plate. Lift it off and the trees are left on the gel plate. Let this dry about 10 minutes.

Don't mind the difference in color of these plates, one plate has been used a lot more and seems to have taken on a color. This does not affect the prints.


When the first layer is dry, pick a color for the background layer. I used Plaid� Color Shift Orange and Yellow for the orange print. These paints are very translucent and sheer so choose your paper color accordingly. I used brown deli paper (ordered from Amazon) for the orange one and blue cardstock for the others.


As soon as you apply the colors for the background layer put your paper down over the gel plate and pull the print. Depending on how dry the black trees are on the gel plate you may have to leave the paper on for a minute or two and burnish the backside with your hand or an old credit card.


Sometime I get distracted and leave the room for a few hours, lol. Pull up a corner to make sure everything is coming up on the paper before pulling the print completely. If it is not completely pulling up the paint put the corner back down and burnish some more.

Happy Printing!
Catherine


Materials:
-6"x6" Gelli Arts� Gel Printing Plate
-4" Gelli Arts� Brayer
-Sizzix "Woodland" 6"x6" Embossing Plate
-Brown Deli Paper
-Blue Cardstock
-Plaid� FolkArt Paints: Multi-Surface Fire Opal and Midnight, Color Shift Yellow Flash, Orange Flash, Red Flash, and Aqua Flash
-Old Credit Card


� 2018 by Gelli Arts�, LLC
Philadelphia, PA All rights reserved.
Read More

Wednesday, September 19, 2018

#GelliArtsFallFever with Gelli Arts� & Plaid�

We are so excited to partner with Plaid� this month. Our design teams joined forces to come up with several festive fall ideas using Gelli Arts� gel printing plates & Plaid� paints.


Our first printing project is from Catherine Tonning-Popowich - who created a layered print with falling leaves. This print captures a classic fall image of wind blown leaves! It's really amazing - right?


Watch as Catherine pulls the print in the image below - it's like the leaves are moving on the paper!


Find Catherine's step-by-step instructions here!

Helen O'Hara takes us on an Autumn coffee break with these coasters and mug rugs!!


I would like some!  Here are the fall hues from Plaid� that Helen used:


Complete details on Helen's projects can be found here.  


Our next project is from Tania Ahmed.  She created this adorable fall banner!  Are you having a get together soon? Check out how she made this one and start thinking of your own!  Hmmm - could be welcoming for family and friends on Thanksgiving!


Check out how Tania made her unique banner here and watch her step by step video that shares all the details! We love it Tania!

Next up, Linda Brun gets us in the mood for Fall with this fabric mobile & matching gift/storage bag!  Linda's step-by-step instructions are here -- and includes a video too!


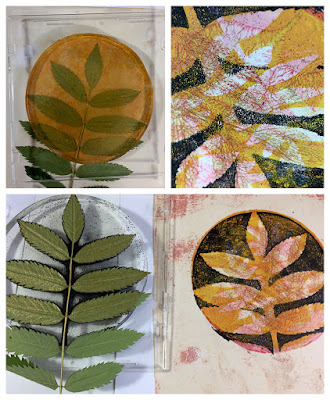
Last but not least, Lucy Brydon uses an assortment of leaves to create seasonal prints.


Click here to follow Lucy's creative process.

Hope you have time to get outside, gather up some leaves and find inspiration in Mother Nature's wonders!

Here are the materials our teams were given to come up with these colorful and inspiring projects:


Please make sure to visit the Plaid� Design Team projects on their blog.

Special thanks goes to Plaid� for partnering with us.  We welcome all the amazing Plaid� fans and hope you will visit us on Facebook and Instagram. You can find lots of printing ideas to incorporate your Plaid� paints on our Youtube channel!

We also invite you to join our September theme on social media! Share your prints using #GelliFallFever and be entered to win a $100 Gelli Arts� Gift Card! Drawing 9/30/18. One entry/person. ONE winner will be randomly selected and notified via social media.


� 2018 by Gelli Arts�, LLC
Philadelphia, PA All rights reserved.
Read More

Thursday, September 13, 2018

Fall Inspired Wreath with Gelli Arts� Gel Printed Papers by Kirsten Varga

Hello fellow Gelli Arts enthusiasts! Kirsten Varga here!

I am super excited to share in the creativity and inspiration of my fellow Gelli Arts� Artists. I was inspired by the Gelli Arts� September theme, #GelliFallFever to create a wreath and I hope it gives you an idea of what to create with all your wonderfully layered and patterned gel prints.

Make sure to check out the giveaway at the end of my blog!


First, you need to create a variety of luscious printed papers. I set up a table and had a marathon monoprinting session using a Gelli Arts� 9"x12" plate and Gelli Arts� Premium Acrylic Paints.


For texture, I used a variety of fibers, handmade foam stamps, found objects and Artistcellar stencils.


I kept it loose and just had fun as I went from color to color and texture to texture to create layers and layers. In the end I had a stack of lovely printed papers from which I chose a few to use for my wreath.


Next, I gathered my willow wreath base and my glue gun. I also cut leaf shapes from my chosen papers. I ended up cutting up two full sheets into my leaf shapes. So. Many. Leaves!!


Lastly, it is time to assemble! To start, I glued five small groups of leaves evenly spaced around the wreath. This gives me a balanced start.


The last step is to just keep going around and around placing the leaves until you reach the level of fullness you are looking for.


I found it handy to have a skewer near by to help set the leaves into the nooks and crannies of the wreath and not burn my fingers.


Your wreath is now ready to be displayed!

Happy Creating!
Kirsten

Materials:
-Gelli Arts� 9"x12" Gel Printing Plate
-Gelli Arts� 4" Roller
-Gelli Arts� Premium Acrylic Paints
-Paper to print on (I used a Kraft colored paper)
-Found materials to use for texture when printing (some suggestions are: stencils, fancy yarn, cardboard tubes, produce netting, homemade foam stamps)
-Glue Gun
-Skewer
-Willow Wreath

� 2018 by Gelli Arts�, LLC
Philadelphia, PA All rights reserved.
Read More

Thursday, September 6, 2018

How To Create Posters With Gelli Arts� Gel Printing Plates


Hi there! It's Marsha here today, showing you how you can create your own eye-catching posters that include text to help get your message across!


Think about all the fun possibilities: print a poster with motivational text to hang in your home, office, or classroom. Create party signs, make the advertisements for an upcoming event, or just commemorate words that mean something special to you personally!


Step 1
Use your favorite gel printing tools to pull a couple of light-colored background prints.

Place the Gelli Arts� gel printing plate of your choice on a smooth flat surface. I�m using the 9�x12� plate which is perfect for bleed prints on A4 and Letter size papers.

Roll a drop (or two) of acrylic paint on the plate with a brayer.


Here I�m using foam stamps as my texture tool. Press the stamp into the paint. Stamp the excess paint off onto a scrap sheet of paper.


Place your paper on top of the plate and rub with your hands to transfer the paint to the paper. Lift the paper.


Clean foam stamps immediately after use. Wipe the stamps with a damp cloth or rinse them under running water. Don't let paint dry on your stamps.


Step 2
Think about what you want your posters to say. Decide on the words: a quote, a slogan or maybe a song title. Write it out on paper.


Think about the composition too. Do you want just the words to fill the poster or do you also want to incorporate a graphic element?

Step 3
Cut out the letters.


Handwritten and hand-cut letters will make your poster uniquely you, but I�ve also found that letters cut from paper often stick to the gel printing plate so you may need to re-adhere them to your paper after each pull.

There are alternative options though! You can cut your letters from low tack stencil film instead of paper, you can write out your text with masking fluid, or you can use alphabet stickers.

Step 4
Position the letters of your choice on one of the light-colored background prints. Use repositionable adhesive to adhere hand-cut letters to the paper.


When using stickers, make sure to remove some of the stickiness before you adhere the letters to the paper. Merely placing the sticky side on a lint-free cloth before sticking them down will do the trick.


Step 5
Start printing layers!

Try to limit your color palette to a maximum of four colors including black and/or white. Use all of your favorite gel printing tools such as hand-cut masks, stencils, stamps, and mark makers.


Add as many printed layers as you like. The aim is to make all of the letters stand out, so cover at least the area around the letters and be sure to use colors that contrast with your light-colored background.

Step 6
End with a layer in the darkest paint color to make the words on the poster pop.


Step 7
Wait until the paint on your poster is dry and then lift the letter masks from the paper.


Remove any adhesive residue by rubbing with your fingers or use an adhesive eraser.


Optional
Use your favorite pencils, pens, and markers to enhance your prints. Add drop shadows or outlines if you feel the letters need a bit more help standing out.


Once you are happy with the results the only thing left is to find a place on your wall to hang the posters so everyone can see your message!

Enjoy your day!
Marsha


Materials
Gelli Arts�:
9�x12" Gelli Arts� Gel Printing Plate
Gelli Arts� 4� roller
Gelli Arts� Square Edge Tools

Other:
Paper to print on (Drawing Paper 160 g/m2 A4 size: 5,8� x 8,3�)
Acrylic paint (Royal Talens Amsterdam)
Foam stamps (ArtFoamies designed by Nathalie Kalbach: Batik Pattern 3, Broadway, Downtown, Manhattan, Santa Fe, Toledo)
Paper to cut masks and stencils (Max. A3 size: 11.69� x 16.53�)
Pencil, pen or marker
(Fine tip) scissors
Craft knife
Reposition-able adhesive
Adhesive eraser
Alphabet stickers (Pickup Helvetica 30 and 40 mm)
Lint-free cloth

Optional:
Ruler
Stabilo All watercolor pencil
Water brush

� 2018 by Gelli Arts�, LLC Philadelphia, PA
All rights reserved.
Read More